Assembling process
Required components:
2.
SMPS(Switch Mode Power Supply)
3.
Motherboard
4.
RAM(Random Access Memory)
5.
CPU chip (Central Processing Unit)
6.
Optical Disk Drive
7.
CPU fan
8.
Hard Disk Drive
9.
Graphics card
Assembling the Computer is the
process of making a completely working system combining various parts of
compatible hardware of the computer system.
A computer is said to be assembled when its various hardware components
like Hard Disk, Memory, Power Supply, SATA/PATA etc. are connected manually in
a proper way so that the system functions smoothly.
Things to Consider:
·
Hold the main board
and expansion cards by edges
·
Return the main board
and peripherals to
anti-static bags
anti-static bags
·
Disconnect the power
before working on the system
·
Never place the
components above the material that can pass electricity
·
It is advised not to
touch in the middle of internal components like processor, motherboard as it
can get short-circuit by static electricity.
·
We should use correct
type of SMPS for the system as requirement provided by the technical
professional.

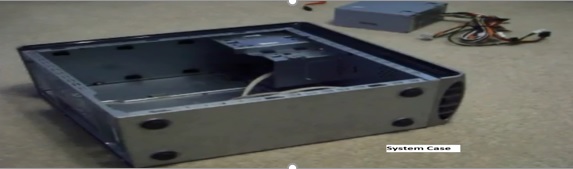
Fig: System Case

Step 2: Insert CPU chip into CPU slot and close the socket.

Step 3: Insert CPU fan and Fan wire into
motherboard. Make sure screw was tided correctly.

Step 4: Insert Motherboard into System Case.
Step 5: Insert Optical Disk Drive. Tide the screw.


Step 6: Insert Graphics card into PCI slot while managing
Graphics port.


Fig: Graphics Card and PCI
slots

Step 8: Insert SMPS in the case and tide the screw.


Step 9: Connect all the cable simultaneously.


Fig: Power Cable


Fig: Serial ATA port and
Cable


Fig: front panel Port


Fig: Connecting power cable
to Optical disk drive
Testing connections:
Plug in PSU power cord into PSU and to wall outlet and start computer. Use usual precautions when handling electricity! Test to see the following are running - all 3 fans - case, CPU, PSU, (and video card fan(s) if separate video card installed). Test power button (PC comes on and off) and reset button (HDD LED light blinks once). Test to see all 3 LED lights work - PLED light (power on light that stays on when PC is on), DVD LED light (comes on at start then goes off), HDD LED light (blinks initially).
Plug in PSU power cord into PSU and to wall outlet and start computer. Use usual precautions when handling electricity! Test to see the following are running - all 3 fans - case, CPU, PSU, (and video card fan(s) if separate video card installed). Test power button (PC comes on and off) and reset button (HDD LED light blinks once). Test to see all 3 LED lights work - PLED light (power on light that stays on when PC is on), DVD LED light (comes on at start then goes off), HDD LED light (blinks initially).
Comments
Post a Comment